Amy’s Free Ideas


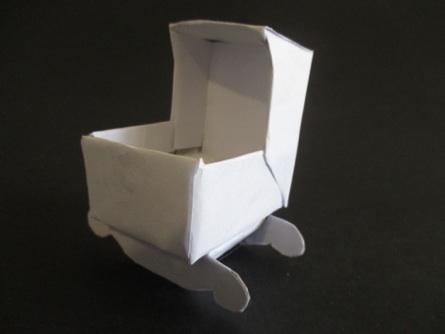

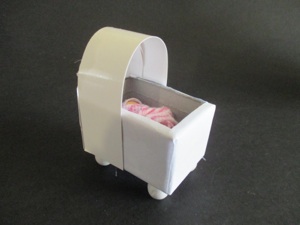
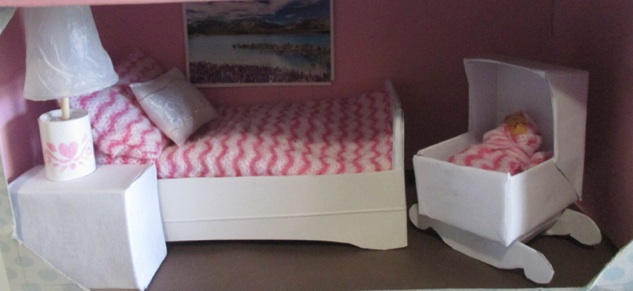
This cradle really rocks
How to make a cradle
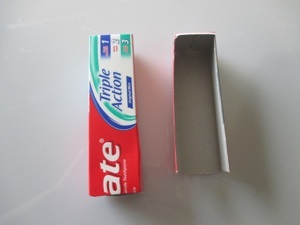
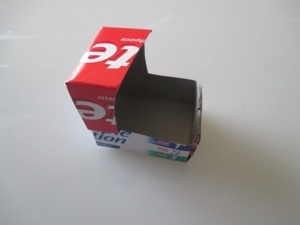
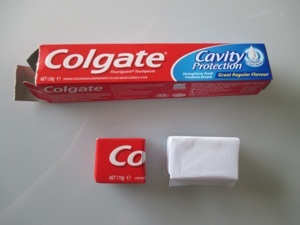
Cut a toothpaste tube box in half the short way, and then in half the long way.
How to make a cradle
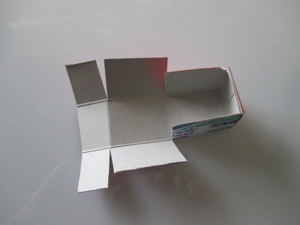
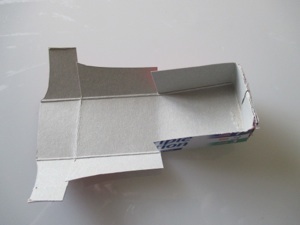
Cut the sides as shown in the photo above.
Fold the box where the cuts are. It should look like this.
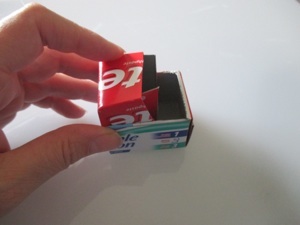
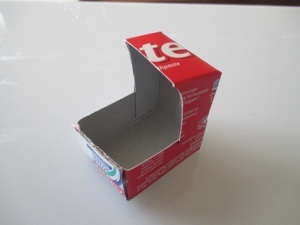
Cut the sides to taper up to the top. Also cut the box end shallower so the cradle is not so deep.
Fold it up again and glue all the flaps.
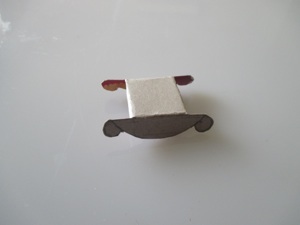
Cover it with white or colored paper. Alternative: paint the cradle.
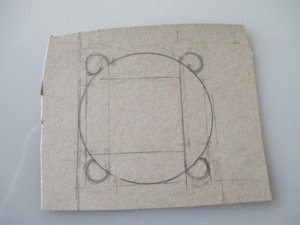
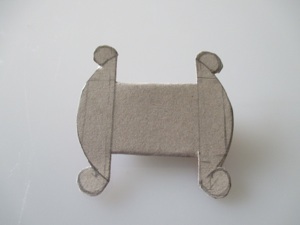
Use a bottle cap to draw a round circle onto thin cardboard, such as a cereal box. Draw 4 small circles where 4 corners would be if it were a square. A pen cap or hole in your grater might be just the right size to draw these small circles.
How to make a cradle
Cut out the big circle with the 4 small circles. Cut into the big circle about 1/4 inch (1 cm) next to the 4 small circles.
Fold these flaps to the middle of the big circle.
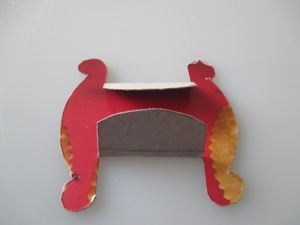
Fold the sides down the same direction as the previous folds. Unfold all the flaps to make it flat again, and glue on white paper or colored paper. Cut out around the cardboard and fold again.
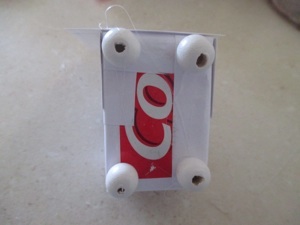
Glue the rocker to the bottom of the cradle. The small round circles keep the cradle from tipping over when it rocks.
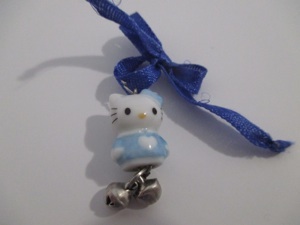
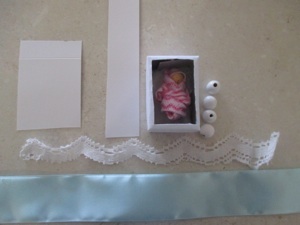
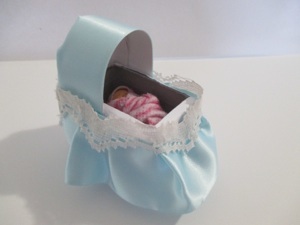
Baby rattle
Use small beads and bells to make a rattle for the baby. Tie with a ribbon.
Bassinet
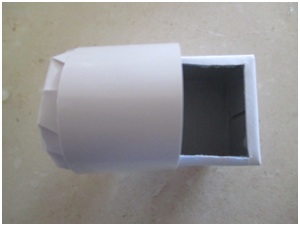
Cut the end off of a toothpaste box--long enough for the baby doll to fit, as well as room for flaps. Cut the 4 corners of the box, but no longer that the width of the box. This creates a flap on each side of the box. Fold these flaps down over each other and glue in place. Cut a hole in one side for the baby.
Alternative: If you do not plan to cover the bassinet with a ribbon, you will need to cover the box with white or colored paper.
Materials you will need:
ribbon
lace
stiff white paper or card stock
4 beads for legs
Glue beads on the bottom for legs.
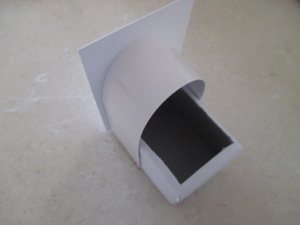
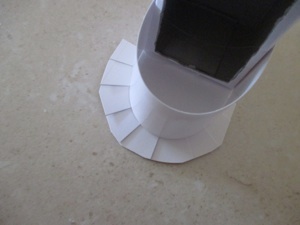
Cut a long strip of stiff paper and glue it at the end of the box on one side and glue it on the other side to form an arch over the bassinet.
Glue a rectangle of stiff paper to the end of the bassinet that comes above the arch.
Cut the rectangle in an the arch about 1/4 inch (1 cm) larger than the arch on the bassinet. Next cut slits all the way around the arch.
Fold each of these flaps up, then press them into the arch to make sure they fit. Pull the flaps back out, put glue on them, then press them all the way into the arch. You can press them securely against the arch from the open side.
The bassinet can be finished at this point if you don’t want bother with the ribbon and lace.
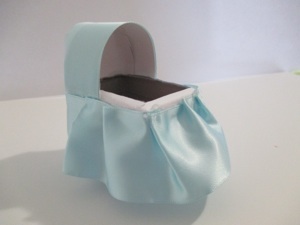
Glue ribbon around the top of the arch. Then glue ribbon around the bottom of the bassinet. Gather the ribbon as you go. If you find this difficult, you can sew basting along one edge of the ribbon and pull the gathers in it before gluing to the bassinet.
Glue lace around the top edge of the ribbon to cover the uneven edge.


Crafts > Crafts for Adults by materials > Tissue box doll house > How to make a miniature cradle and bassinet
Crafts > Crafts for Girls > Tissue box doll house > How to make a miniature cradle and bassinet