Amy’s Free Ideas


How to Make a Dress
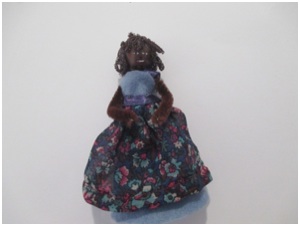
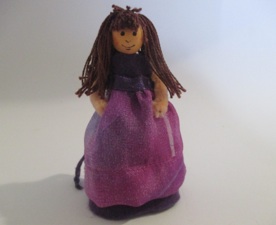
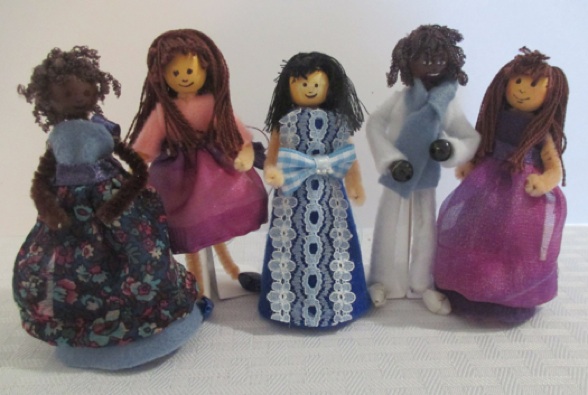
Floor length dresses enable the dolls to stand. Felt is a good material to use because it doesn’t ravel, so it doesn’t need to be hemmed.
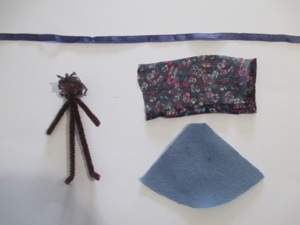
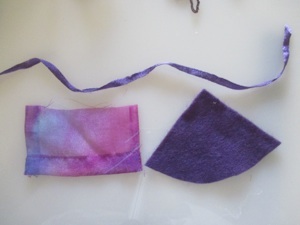
Materials:
-
1.Felt triangle
-
2.Ribbon
-
3.Optional: Rectangle of fabric for an“apron”
(if you use regular fabric for this, you will need to hem the edges so they don’t fray)
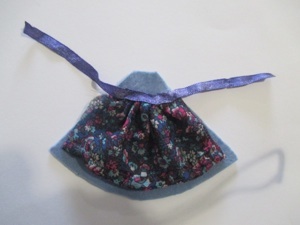
Cut a felt triangle that is the height of the doll, from the chin down. Cut off the top point. Sew a line of stitches across the top of the apron, then pull the thread to gather the top of the apron. Tie a knot.
Glue or sew the apron to the front of the felt triangle. Glue the ribbon on top of the apron to hide the gathered edge. this forms the belt. Make sure the ribbon is long enough to tie in a bow in the back.
Glue short lengths of ribbon to the front of the triangle to be shoulder straps.
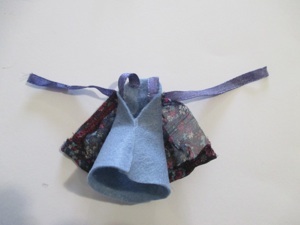
Bring the sides of the triangles to the back and glue or sew them together up about 2/3 of the way--leave enough room to put the dress on the doll. Glue or sew the shoulder straps to the back.
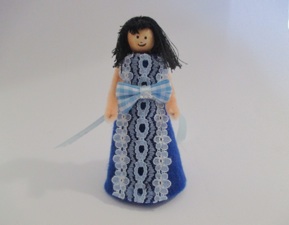
Another version of a long dress: make in the same way as shown above.
A different way to decorate a long dress is to glue a strip of lace on the front of the dress triangle. A tiny bow decorates the waist.
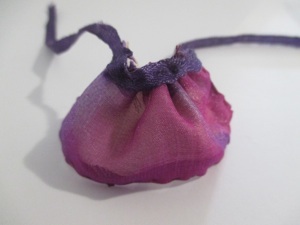
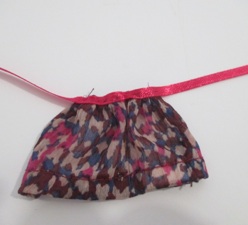
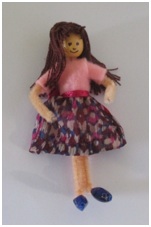
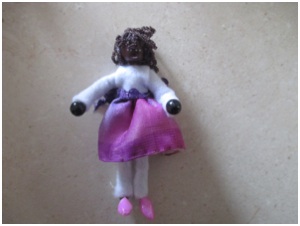
Short skirt
A short skirt is made the same way as the “apron”--tie it in the back with the ribbon belt. Make sure the ribbon is long enough to tie in a bow in the back.
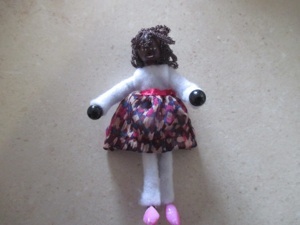
Make one top to go with several skirts. After the top is on the body, glue the head on. Even though the shirt can’t be changed, changing the skirt makes it look like a new outfit. Notice the beads used as shoes--a different color for every outfit.
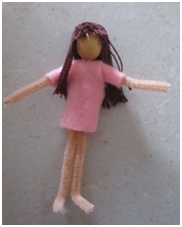
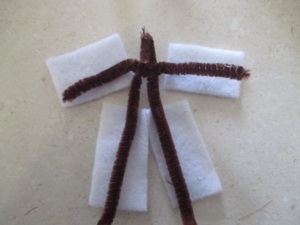
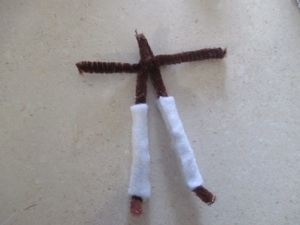
Cut rectangles for both legs and arms.
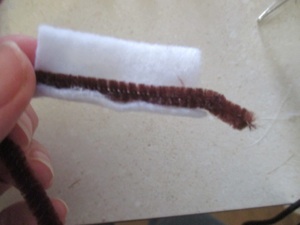
Roll the felt around each leg, and hold in place.
Put glue along the edge of the felt and roll the felt into a tube. If you use a glue gun, it is REALLY easy to burn yourself, so be careful. Hold in place until the glue hardens.
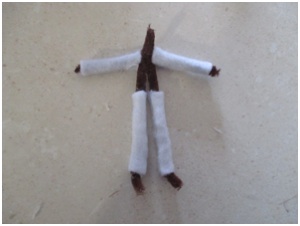
Both pant legs glued on
Glue on the sleeves the same way as the pant legs.
Cut out a shirt shape which should be double what is showing in the photo--the front (the part that is showing in the photo) and the back (the part that is not showing.) Cut a small hole for the neck.
Glue the seams under the arms.
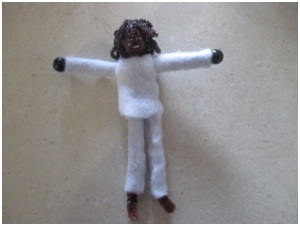
Glue the head on the doll.
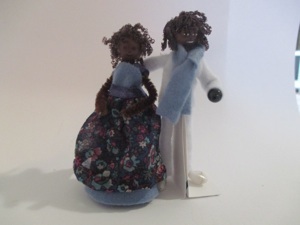
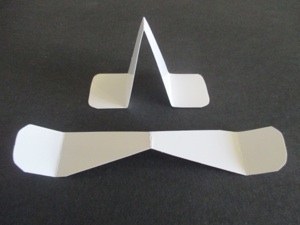
Dolls with short skirts or pants can’t stand on their own, so make a stand from thin cardboard. Cut and fold it as shown in the photo above. Stick the point between the doll’s legs to make it stand.
Vary the colors and designs of the outfits to make a closet full of clothes for your dolls. The dolls with the long dresses can stand unaided. The dolls with the short skirt and pants need the stands to be able to stand. All of the dolls can sit, or hold a baby doll, or hold a pan, because they are made with bendable arms and legs.


Pants/body suit
Make a shirt and pants--you can’t take them off, but if you add a scarf or skirt, and change shoes, it looks like completely different outfits. When you put a skirt over the pants outfit, it becomes leggings and a top. This is quite a bit more complicated than a dress.


Crafts > Crafts for Adults by materials > Tissue box doll house > How to make miniature doll clothing
Crafts > Crafts for Girls > Tissue box doll house > How to make miniature doll clothing