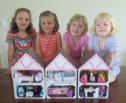
Amy’s Free Ideas


Crafts > Crafts for Adults by materials > Tissue box doll house > Decorate the outside of the dollhouse
Crafts > Crafts for Girls > Tissue box doll house > Decorate the outside of the dollhouse


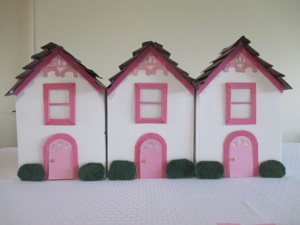
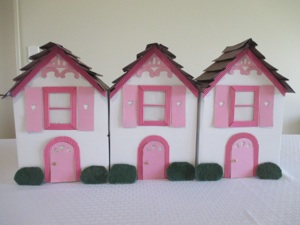
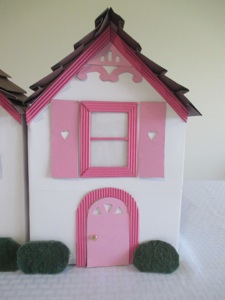

The front of the houses can be purely decorative, or they can have functional doors that can open and close, and you can see through the windows. The windows and door in the photo are decorative only. Since the rooms are so small, having doors and windows in the back wall will affect the layout of the rooms, so keep that in mind when you decide which way to make it. It is also a bit more work to make them functional. Another thing to keep in mind is that when you open and close the doors, it can shake the house which tends to topple things in all the rooms. It can be frustrating to get everything arranged just so, and then open a door and knock everything over. This is especially the case for younger children. However, no one can deny that it is WAY COOLER to have windows and doors that really work!!
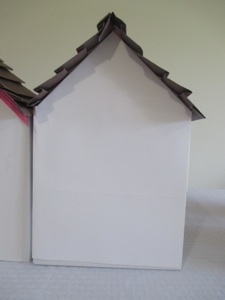
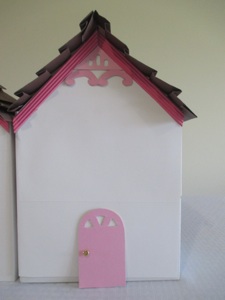
Cover the outside of the box with paper, or paint it. This one is covered with plain white copier paper, and glue stick was used to glue it on.
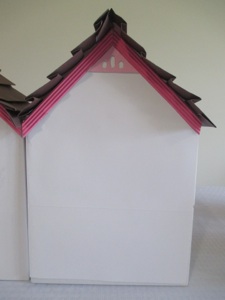
Cut thin cardboard or corrugated paper to fit under the roof. If you use thin cardboard, such as a cereal box, glue colored paper paper to it. Colored paper by itself will look too flat. You can use double stick tape, or a glue gun to fasten the pieces in place.
Make “vents” by gluing colored paper to a piece of thin cardboard, and cut a triangle to fit under the colored strips under the roof. Use a hole punch to cut holes for “vents.”
The more decorations you add, the more interesting it looks. Cut 2 “C” shapes out of thin cardboard covered with colored paper. Be smart about it--glue a piece of colored paper to a cereal box, and cut all the pieces out of that rather than cutting out the cardboard and paper separately, then gluing them together.
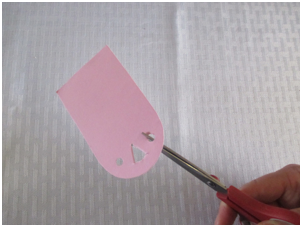
Cut the door out of thin cardboard covered with colored paper. This door has a rounded top, but you can make a rectangle door if you prefer. To make windows in the door, punch holes with a hole punch for the top rounded ends. Then use scissors to cut the pointed end. Make a door knob out of a brad (paper fastener) or glue on a bead.
Cut a door frame out of contrasting color of paper glued to thin cardboard, or corrugated paper, as in the photo above. Glue the door and frame to the house.
NOTE:
If you want to make the door to open, BEFORE you glue the door and frame on, hold the door in place, and with a pencil, draw an outline around the door onto the house. Then use a box cutter or craft knife to CAREFULLY cut along the bottom of the door, up one side and around the rounded top. DO NOT CUT ALL 4 SIDES, OR YOU WILL END UP WITH A HOLE INSTEAD OF A DOOR. Fold the door along the remaining un-cut side so the door can open and shut. Next glue the cut-out colored door and doorframe to the house.
Make a lock for the door:
When you glue the frame to the house, if you leave a gap without glue next to the brad doorknob, you can turn the knob, and the legs of the brads on the back side of the door can slide between the wall and the doorframe to “lock” the door shut.
Make windows and shutters out of thin cardboard that has colored paper glued on it, or cut them out of corrugated paper. Cut hearts on the shutters the same way as the windows in the doors--use a hole punch to punch two holes close together for the 2 humps of the heart, then use scissors to cut the point.
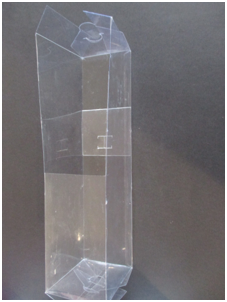
If you want the window to be decorative, you can simply glue the window frame and shutters to the house. However, the ones shown here have a plastic rectangle cut from an empty plastic package. The window frame was glued to the plastic rectangle then glued to the house. A glue gun is the best way to glue the window in place.
How to make a window that will open and close
Cut a rectangular hole in the wall for the window. Glue 2 thin cardboard strips on the INSIDE of the house on either side of the window hole. The strips of cardboard should overlap the “window glass” (plastic rectangle which has no frame.) Be careful not to let any glue get on the plastic rectangle so that you will be able to push the window up and down. If you accidentally get glue on the window, and it won’t move, pull the strips off and glue again.
NOTE: If you want the window to slide side-ways instead of up and down, glue the strips above and below the window.
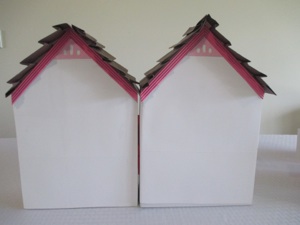
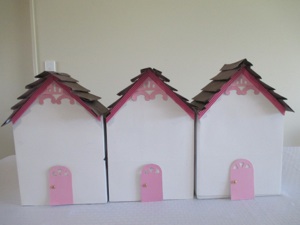
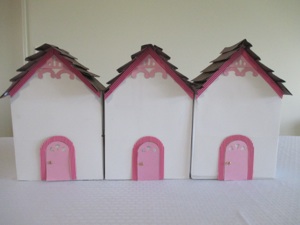
Repeat this process for each of the sections of the house. You could make each one different--with different colors and different decorative elements.
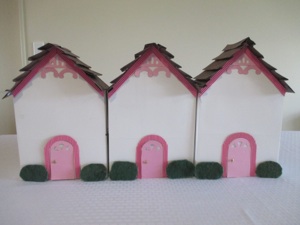
Optional: make bushes on each side of each door. These have been cut out of green scrub pads used for washing dishes, but colored paper glued onto thin cardboard would work just as well.

How to make a see-through window
Cut a rectangular hole in the wall for the window. Then glue the frame around the hole. If you want the window to have “glass,” glue a plastic rectangle over the hole. Then glue a window frame onto the plastic rectangle, to hide the glue. A glue gun is the best way to glue these.